
It should be evident already from previous posts, but I do a lot of 3D printer work in my free time. Recently though, I have been trying to expand my plastics works possibilities. I’ve contemplated making a vacuum former or an injection molder. Naturally, building a vacuum former is much simpler than an injection molder so I decided to start with that. I watched quite a few YouTube videos in preparation for this build. Most of my decisions were influenced by this build video although I definitely took a different approach to some of the decisions.
I ended up starting by purchasing a ceiling mount space heater. I looked over the one in his video and thought it was perfect for this, but it seemed a bit overpriced so I did some more searching. I found out that Menards (for anyone outside of the midwest US, that’s a local hardware store chain) carries a model that is identical and just rebranded for less than half the currently listed price of the one included in that video. Now that I had that, I took some measurements and started with the base box.
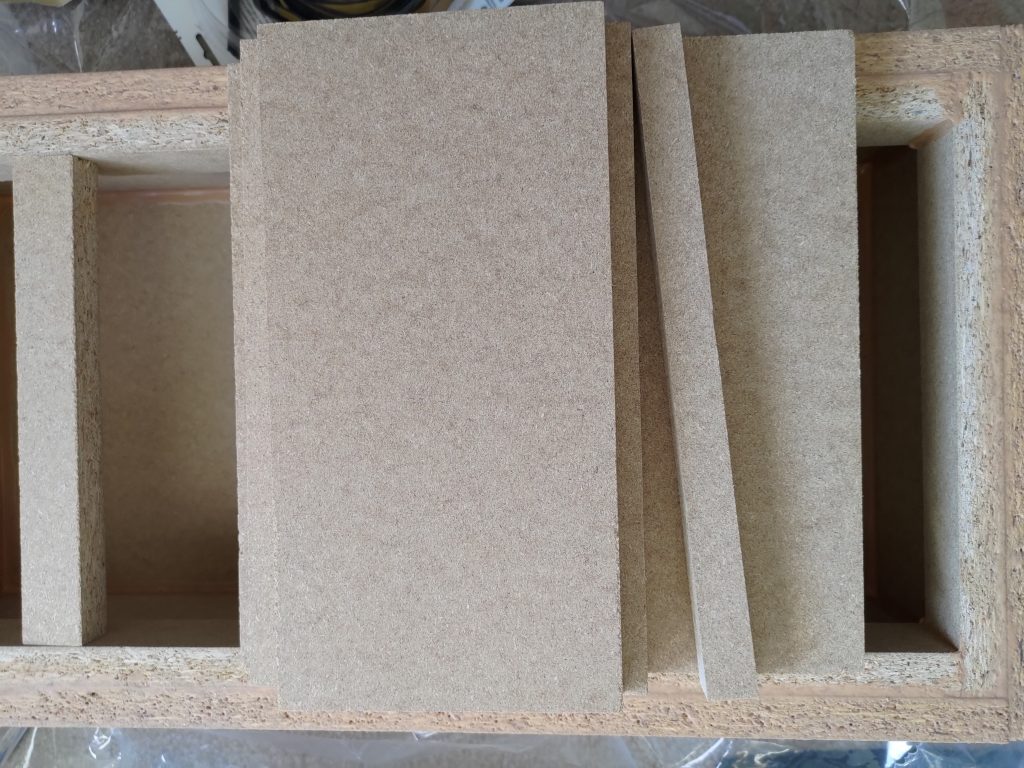
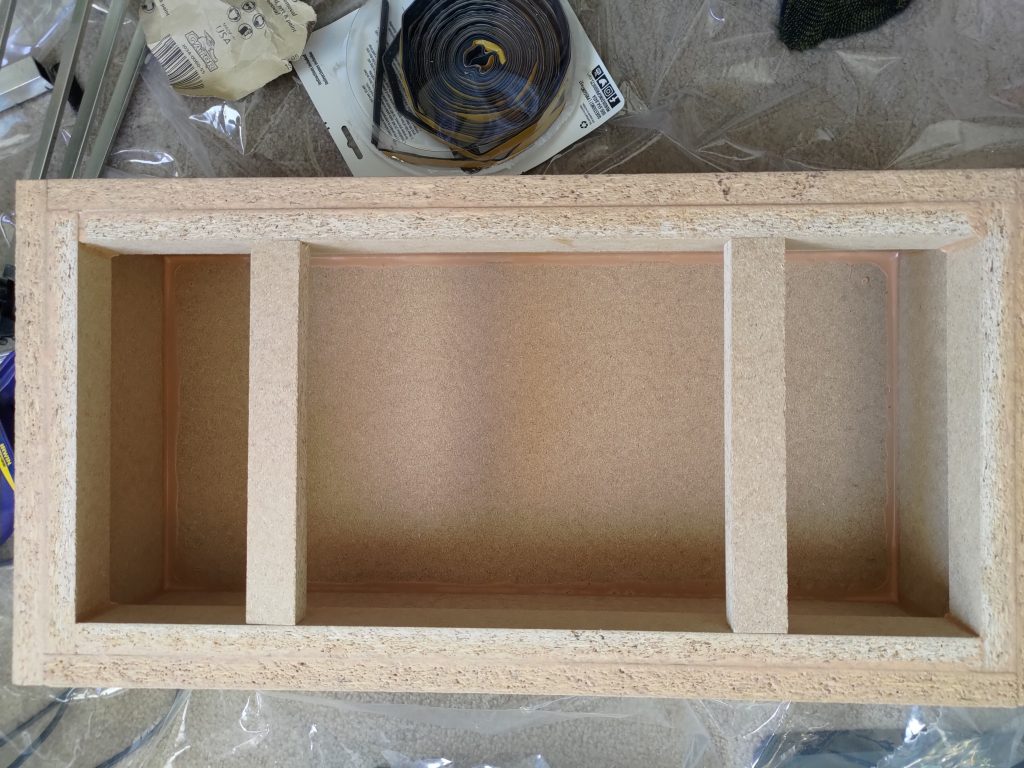
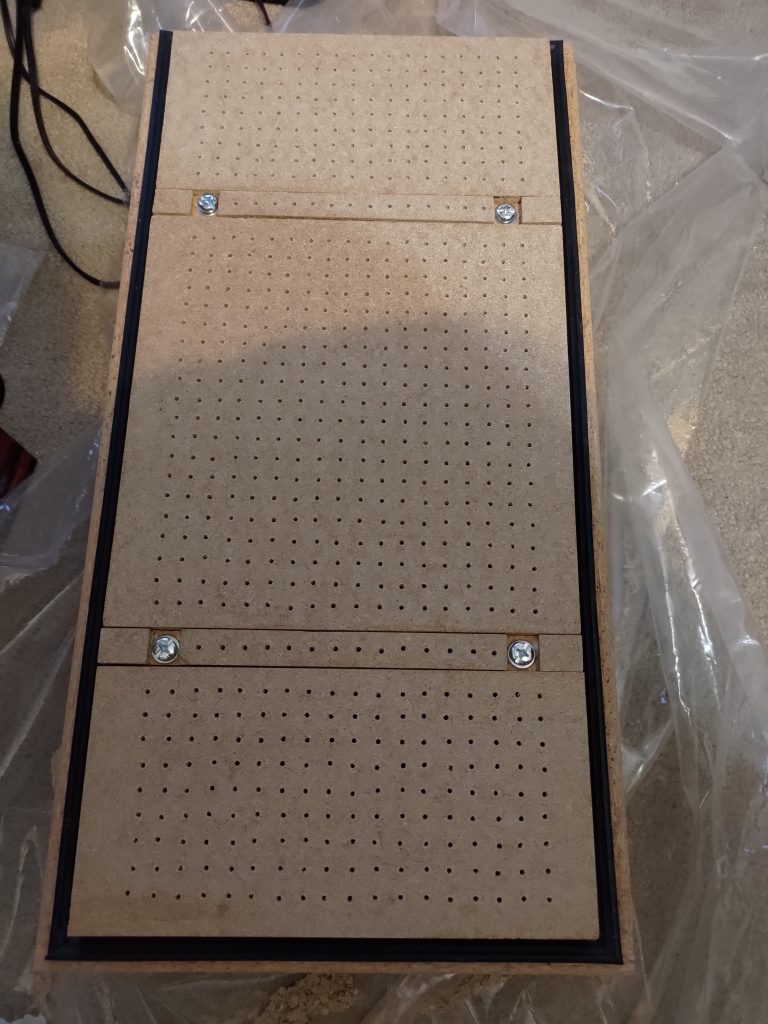

The base box is roughly 6 inches high with a surface area of 1×2 feet. This would allow me to work with anything sized 1×2 feet of course, but I also was hoping for it to be able to support 1×1 feet plastic sheets. I thought about putting an open strip in the middle of the vacuum surface, but realized that because of how the space heater is designed, it would be much better in the middle for heat distribution. This led me to cutting out two gaps about 6 inches in on each end so that I could center 1×1 plastic sheets. I did want air to pull through these strips though and I didn’t want it to leak so I picked up some silicon weather stripping and laid it down under the strips. I drilled holes through the strips and silicon so air could be pulled through in those areas. I went with silicon weather stripping because it should be able to handle the higher temps better than standard foam weather stripping. I then put inset screws into the removal strips so that I could tighten them down against the weather stripping. This gave me a nice surface for 1×2 foot pieces or I could remove the strips and use 1×1 foot sheets for smaller forms. The last step on the base box was using the silicon stripping as a seal around the entire 1×2 foot rim. I also made a couple of MDF blocks that I could screw mount over each of the outer set of air holes for when I have a 1×1 sheet mounted so that I can seal them and have suction on the smaller area.


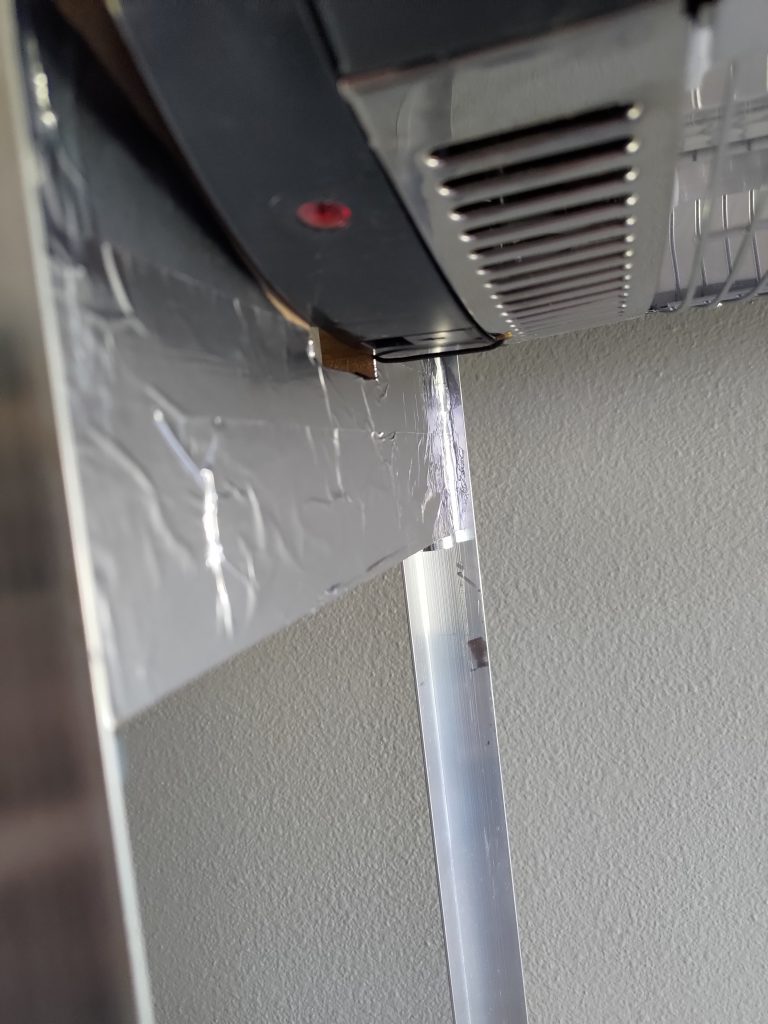
Next I built a small box to hold the heater. The heater itself is slightly larger than 1×2 foot. On the end, it is longer by the ceiling mount arms. On the sides, it is just the body itself that is longer. What I ended up doing to keep the box holding the heater to 1×2 foot, was to cut vertical holes to slide the arms into on the ends and cut the entire length of the sides slightly shorter. This meant that the ends would hang below the heater and the sides would be above the heater when the box was assembled. I used cross slats on top to provide the box with some rigidity and provide mount points for the ceiling mount arm on the heater. Since the ends hung below the heater and the vacuum former is made with MDF/plywood, I put aluminum tape on the inside to prevent burning. Lastly, I mounted the heater above the vacuum box via aluminum 90 degree lengths.
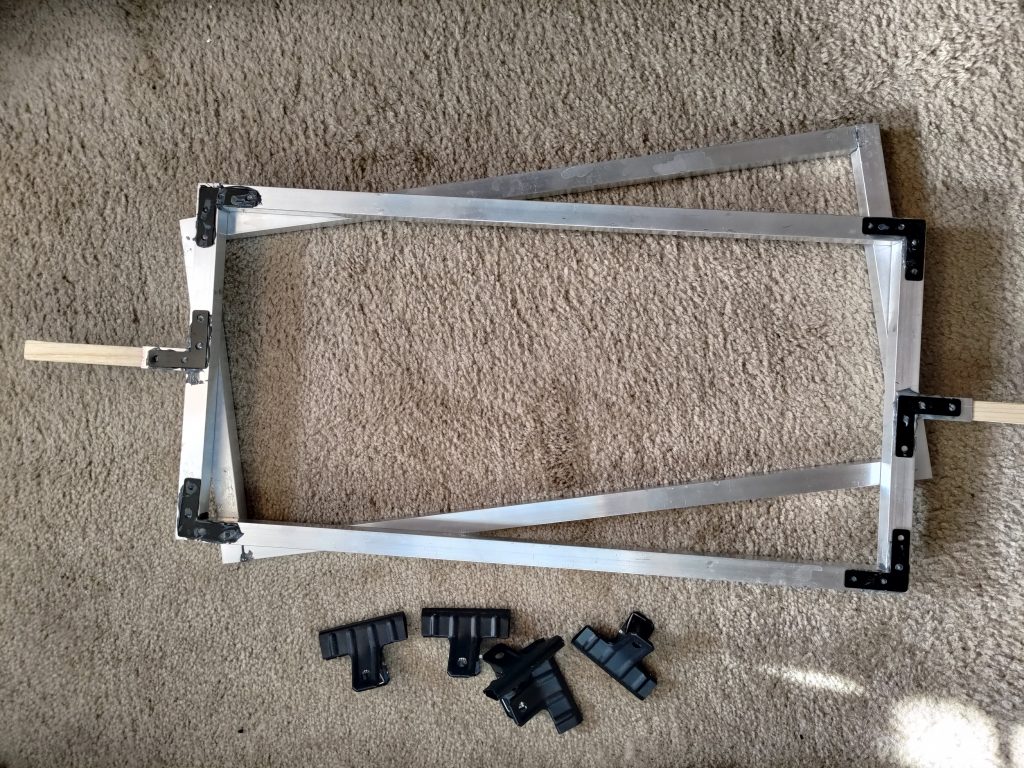

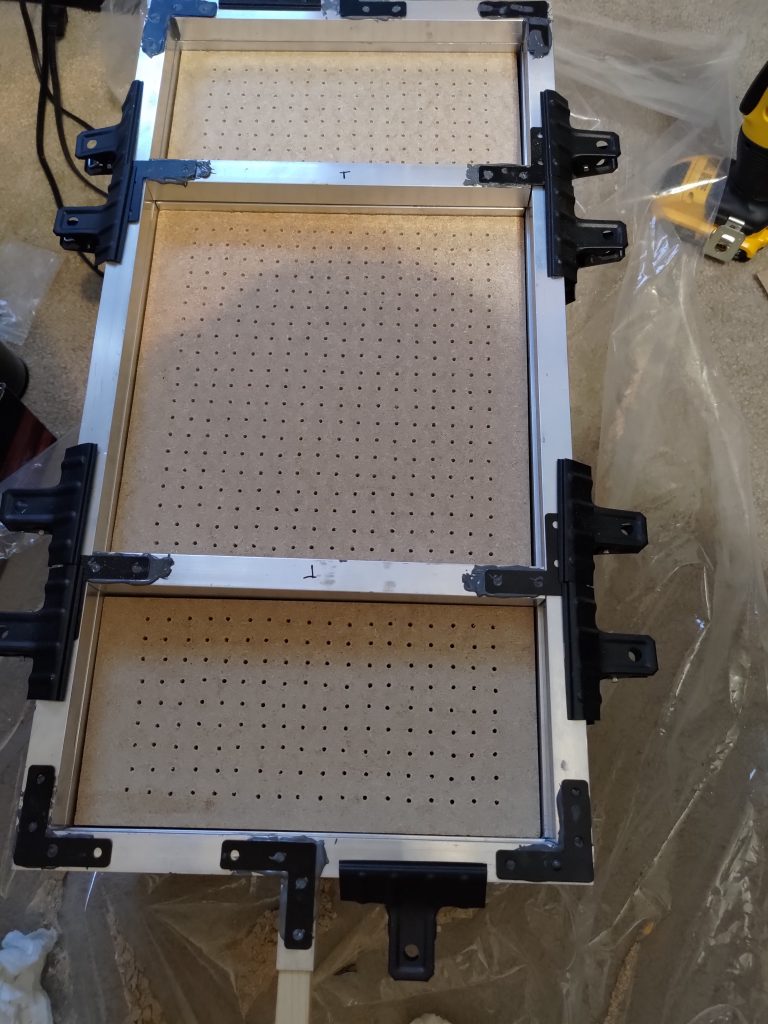
The frame that holds the plastic sheets is also made of aluminum, although this was 3/4 inch aluminum square, hollow rods. I considered a few different methods of assembling the frame, but ended up using JB Weld since it supported a high temp, was incredibly strong, was easy to use, and didn’t involve me getting welding equipment. In order to provide support on the corners, I used steel 90 degree flat brackets. These didn’t have to be screwed in and I simply used the JB Weld epoxy to hold them in place. It provided a large surface area for the epoxy and thus lead to an incredibly strong joint. I used small extra pieces of aluminum rod on the ends to provide an opening that I could hammer wooden handles into so I wouldn’t have to hold onto the metal (heat resistant gloves are definitely a good idea either way). I made another frame to go below this frame with identical construction, minus the handles. The top and bottom frames were then held together by steel clips. I couldn’t find steel clips that would hold something this thick so I just clamped them in a vice and opened the mouth on them a bit so they would fit well. Lastly, I had to accommodate the 1×1 sheets. I made 4 pieces of aluminum rod to traverse the width of the frame and mounted a 90 degree flat bracket to each end. This allows me to clamp the pieces to the outer frame, thus providing removable inserts for 1×1 sheets.

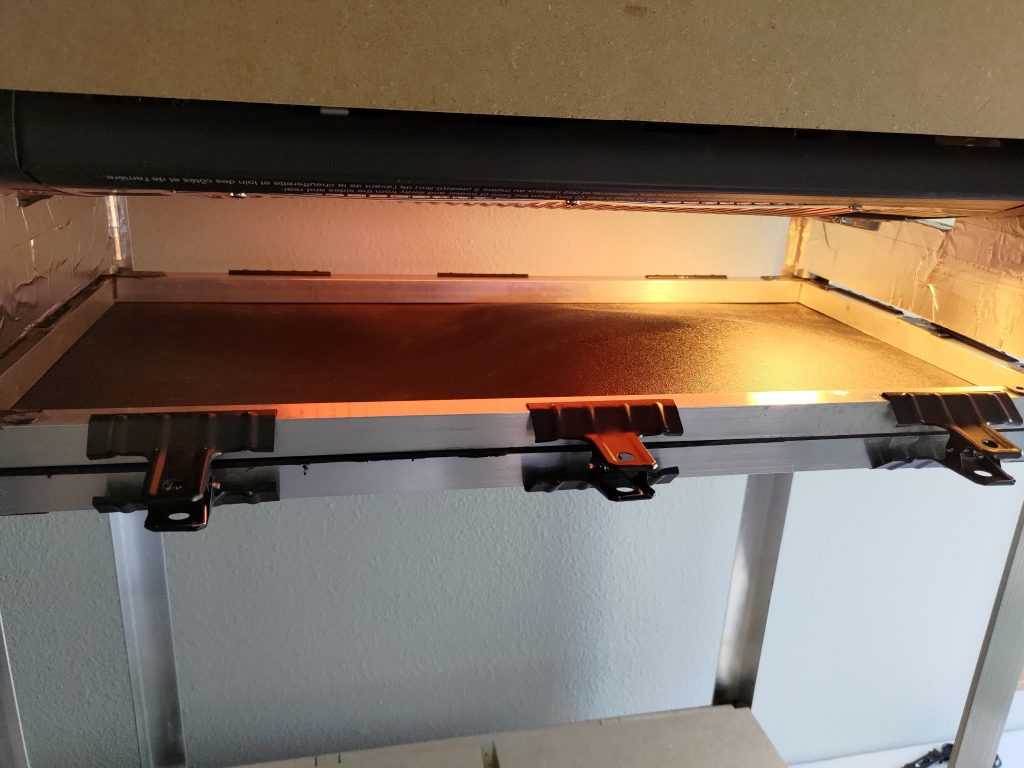
I then put magnets under each corner of the end boards on the heater box so that I could have the plastic sheet frame clamp to it while it was heating. I lubricated the vertical rails with PTFE lubricant to allow the frame to cleanly slide up and down.
The only other piece I needed was a shop vac. I cut a hole in the vacuum box and connected the shop vac hose to it.
And that was the build! Not an overly complicated build, but a bit of complexity added by supporting1x1 foot and 1×2 foot sheets.
